So, the problem is your wifi not working on a Windows 10 laptop. Hey! Welcome to the club. There are tons of Windows 10 users who are dealing with the same right now. The other day, when I faced this issue of the wifi not working on my Windows 10 laptop mine, I asked Google for its solution. Astonishingly, I found out that the web is flooded with similar search phrases -
- Windows 10 has no wifi option in settings.
- Windows 10 wifi driver
- Wifi is not working on Windows 10 laptops despite an internet connection
- Windows 10 wifi disconnects frequently
- Windows 10 wifi adapter is missing
- Why is wifi not working on a Windows 10 laptop?
Also read: How to Fix HP Laptop wifi Not Working Problem.
As you can understand, this wifi not working on Windows 10 has many faces and appears in front of you for many reasons. Thus, this article focuses on addressing these similar wifi-related issues and how to fix these wifi glitches in spartan ways.
Forewords :
Before we dig deep into this problem, Windows 10 is great to work with as it's one of the best OS on the web. Admittedly, many sterling features like Cortana integration, virtual machine, the latest Edge web browser, Universal apps, and Windows action center exist. But, the most important and the most debated feature of Windows 10 is the return of the good old 'Start menu.' But, with all these bright sides, there are some drawbacks, including the Windows 10 wifi. And, often, it's found that users are facing troubles, and that's - wifi not working on Windows 10. It may appear silly, but checking for these is always better. Who knows, a simple 'overlooked silly mistake' will save the day for you? So, before gunning for the significant issues, check these:
- Is your modem and router powered on?
- If your laptop has a physical wifi switch, is it switched on?
- Have you tried to reboot your modem/router?
- Have you tried to reboot your Windows 10 laptop?
- Have you tried to reset the physical connection of your wifi network?
- Is your ISP healthy?
If the answer to these questions is 'yes,' then it's time to move to the deeper areas. So, let us move to our focal point: Why is the wifi not? Why is it on wifi 10?
Also Read: Wifi Not Working On Dell Laptop? Resolve this in 5 Easy Steps
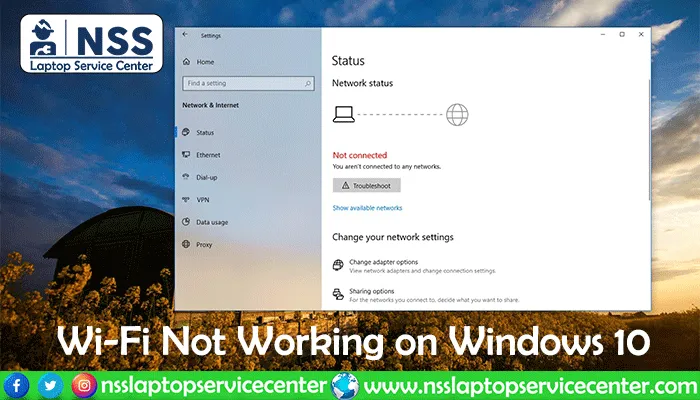
The wifi is not working in Windows 10 despite the active Internet connection.
The exact message from the Windows 10 may look like this: ' Windows 10 can't connect to this network. Windows 10 network adapter, or wifi driver, is not working correctly. Further, to check the health of the network adapter and solve this issue, try this:
- Press the Windows button + X.
- Locate and click on 'Device Manager'.
- Locate the option' Network Adapter.'.
- Expand 'Network adapter' and choose 'uninstall device'
- Further, select 'Delete the driver software for this device.'.
- Now, 'Restart' your Windows 10 laptop.
- You will notice that after restarting your laptop, Windows will search and re-install the required driver software for a Wwifi-F connection.
So, it seems pretty straightforward. Right? If this doesn't solve your problem and your wifi is not working on a Windows 10 laptop, try the other solutions detailed in this article. Added to this, there's another way to address this wifi issue, and that's the version of the driver software. Technically, at times, windows 10 fails to update the required driver software due to network limitations and its internal updating system's glitches. So, at that time, the version of any driver software can cause unexpected annoyance. Thankfully, there's a simple way to fix this Windows 10 wifi problem.
Fix the Windows 10 wifi Driver Version.
Please, follow this:
- Press the Windows button + 'X,' or right-click on the 'Start Menu.'.
- Choose 'Device Manager'.
- Locate the section network adapters.'
- Click on the '>' sign adjacent to the 'network adapters' to expand the different adapter options on the drop-down list.
- Locate your required network adapter and right-click on it.
- Choose the 'properties' option.
- Now, choose the 'Driver' tab in the newly opened window.
- Choose the 'Update Driver' or the 'Roll-back Driver' option.
If Windows finds an updated version of the required driver software, it will automatically solve the problem. Otherwise, you will have to go to your laptop manufacturer's website to search and download if there is an updated version of the driver software that you are looking for. Restart your laptop if there's any existing driver software version change.
Is your wifi not working on Windows 10 because it can't find any wifi network?
This wifi issue is also related to the driver software. But you must be sure your wifi connection is healthy, and you can access the web. Before changing anything on Windows 10, you must ensure this. And it must provide the condition of the pretty network. Try connecting another Wi-Fi-smart device with your wifi network. Check whether that device gets connected to the wifi network and gains access to the web. If it's not, then it's time to turn your attention towards your modem and your wifi router. Further, there can be a problem with your ISP, too. So, it's better to gradually narrow down the area systematically to find the root cause of the wifi issue and the particular piece of hardware or software responsible for it. Returning to the Windows 10 laptop, let's consider that your 'Windows update settings' is in auto mode. It's fine. Now, what happens is that Windows 10 will automatically look for driver software updates from its official store. If there are any, it will download and install that updated version of the driver software. So, up to this point, this is okay; it may happen that just after the installation of the driver, your wifi adapter may become blind to the previously known wifi network. The result? Windows 10 can't find the Wwifi-F network - it becomes a real hiccup. The remedy? You must roll back the driver software version of your Windows 10 wifi network adapter. The process of getting there is already discussed in the previous section. So, chill. It's like getting two birds stoned at once. But, the problem can get triggered from another area. Not all, but many Windows 10 network adapters have access to the 'region' property. That can be why your isWi-Fi is not working on a Windows 10 laptop. How to fix it? Please follow these:
- Press the Windows key + R.
- Key in 'devmgmt. MSC and hit 'Enter.'
- Choose the 'Network adapter' and expand it.
- CChoose the name of your required network adapter from the drop-down list of adapters from the drop-down list of adapters.
- Choose 'Properties' and then the 'Advanced' tab.
- Highlight the 'Country & Region' tab.
- Key in your values.
Bingo. You are done. Now, reboot the laptop, and you may find that Windows 10 can find your wifi network and connect to that.
Wifi is connected. The Internet connection is live. But no access to the web.
It seems weird. Right? Everything is working fine, but still, it's like getting back to square one - wifi not working on Windows 10. Bummer! Yes. It happens. There are three cardinal issues behind it. Namely, DNS client resolver cache, glitchy TCP/IP stack, and IP address coupled problems. Thankfully, it can be easily fixed through the 'network troubleshooter.' Go to Windows 10 Settings >> Update & Security >> Troubleshoot >> Internet Connections.
Now, this is an easy fix. But, at times, it fails to solve the problem. Another way to fix and crack is through the Windows command line.
Fix Windows 10 wifi problems through the command prompt.
You must run a set of commands using the Windows command prompt—type 'cmd' in the left search box on the taskbar. Now, right-click on Command Prompt App and select 'Run as administrator,' then click 'Yes.' Here, it's always a better practice to analyze the network connection report to understand the connection problems before you try to fix them. Type netsh wlan show wlanreport', and it will generate an HTML file covering all the wifi events from the last three days. The results are grouped by wifi sessions, revealing the reason for the disconnection. That's how it becomes easy for you to evaluate the reason behind the situation of wifi not working on Windows 10 on your laptop. Now, if you are done here, let's focus on fixing. Try running each command shown below successively and press 'Enter' after keying each order into the order prompt window.
- 'netsh winsock reset' - recover from any probable socket error
- 'ipconfig /release' - release the preset IP address
- 'netsh int ip reset' - resetting the TCP/IP protocols to its default value
- 'ipconfig /renew' - renew the IP address
- 'ipconfig /flushdns' - flush DNS values
Reboot your laptop and check. If you are still stuck with the 'Wi-Fii not working on Windows 10' issue, other ways exist to arrest the problem.
Other common wifi issues and their fixes.
Firewall & Anti-Virus:
- Maybe the Windows 10 Firewall is blocking the way your laptop is connected to any wifi network. Turn off or disable the Windows firewall and try reconnecting your computer with the wifi network. If everything goes fine, turn on or enable the firewall again. This whole workaround is valid for anti-virus programs, too.
Wireless profile:
- Your Windows 1o wireless profile may get bugged. Deleting the wireless profile and re-creating it to freshen things up is better.
Do this: Go to Search >> CMD >> Command prompt and run this command - 'netsh wlan delete profile name=’your profile name". Replace 'your profile name' with your actual profile name. Hit 'Enter'. Now, recreate your wireless profile again.
Disable IPv6:
- Both on your Windows laptop and your router. Go to Network and Sharing Center >> Connections(your active connection will get highlighted) >> Properties >> Uncheck the box adjacent to the IPv6 option.
I bet if the problem of your wifi not working on a Windows 10 laptop is still not solved, then it's probably any deep hardware issue, and it's definitely out of the 'can be done at home' type of workarounds. So, it's better to check your laptop with the local professionals. But I strongly recommend bringing your computer to an authorized laptop service center to solve the issue.
Here is the List of Dell Authorised Service Centers in Kolkata | Lenovo Authorised Service Centers in Kolkata
Frequently Asked Questions


Popular Post
- How To Find Ip Address Of Laptop
- What Is Sleep Mode In Laptop
- How To Check Dell Laptop Model Everything You Need To Know
- How To Make Resume In Laptop
- Why Should You Cover Your Laptop Computer After Work
- How To Zoom Inout On A Laptop
- How To Screen Record In Acer Laptop
- Gaming Laptop VS Normal Laptop
- Do We Need To Format A New SSD
- How Do I Fix Disk 100 In Windows 10 Task Manager
Categories
NSS Laptop Service by Location
Popular Services
- MacBook Battery Replacement Cost
- HP Printer Repair in Delhi NCR
- Dell Laptop Repair
- HP Laptop Repair
- Samsung Laptop Repair
- Lenovo Laptop Repair
- MacBook Repair
- Acer Laptop Repair
- Sony Vaio Laptop Repair
- Microsoft Surface Repair
- Asus Laptop Repair
- MSI Laptop Repair
- Fujitsu Laptop Repair
- Toshiba Laptop Repair
- HP Printer Repair Pune
- Microsoft Surface Battery Replacement
- Microsoft Surface Screen Replacement


