Disclaimer: If you're a fan of modesty, one of the infallible ways to make your OS cleaner is to hide folders in Windows 10. Though Microsoft hides several folders by default, you may find that your drives fill up with rarely accessed content over time. This blog explains an easy way to hide files in Windows 10 and view hidden files in Windows 10.
Nowadays, privacy is all that matters - passwords, keys, user approval; everything revolves around this concept, and it's for the best understanding of how many troubles have emerged recently.
If You Want To Watch Video Click ↓
Table of Contents
- Hidden Folders in Windows 10
- How to show hidden files or folders on a Windows 10 laptop
- How to make a remote file or folder on a Windows 10 computer
- How to Hide Files in Windows 10 with File Explorer
- How to Hide a Folder in Windows 10 with Command Prompt
- How to Unhide Folders and Files with Command Prompt
- Checking if a file\folder is hidden
- how to password-protect a folder in Windows 10
- Conclusion
This is particularly true of the documents folder, which will accumulate configuration files, game saves, and other clutter that can make it challenging to remain productive over time.
Hidden Folders in Windows 10
We will show you how to hide folders on Windows 10 so you can keep your documents ga,mes pri, vote, or get them out of the way. We'll also show you how to show hidden files and unhide hidden files if you want to get them back.
How to show hidden files or folders on a Windows 10 laptop
1. Press the Windows icon at the bottom-left of your screen. And search for this PC application. Click it to open it.
2. You'll be greeted with a listing of all your computer's drives. Open the one that has the files you're looking for. In most cases, "C:" will be your need.
3. Once you're on the next page, there should be a toolbar at the top of the window with a button that says "View." Click on that.
4. Find the checkbox called "Hidden Items." Click it so that a checkbox appears.
5. As long as Hidden Items remain checked, you can view any hidden file or folder.
You can tell that a file or folder was marked as hidden by its icon, which will be slightly transparent.
You can also tick a file or folder as hidden, which is an excellent way to keep your files private. Here's how:
How to make a hidden file or folder on a Windows 10 computer
1. Find the File or folder you want to hide.
2. Right-click it and select "Properties."
3. In the menu that appears, check the box labeled "Hidden."
4. Click "OK" at the bottom of the window.
5. Your File or folder is now hidden.
You can undo a hidden file or folder to make it visible.
Usually, system files and folders are hidden for a reason, and it's best to know that reason before you edit files that are hidden by default.
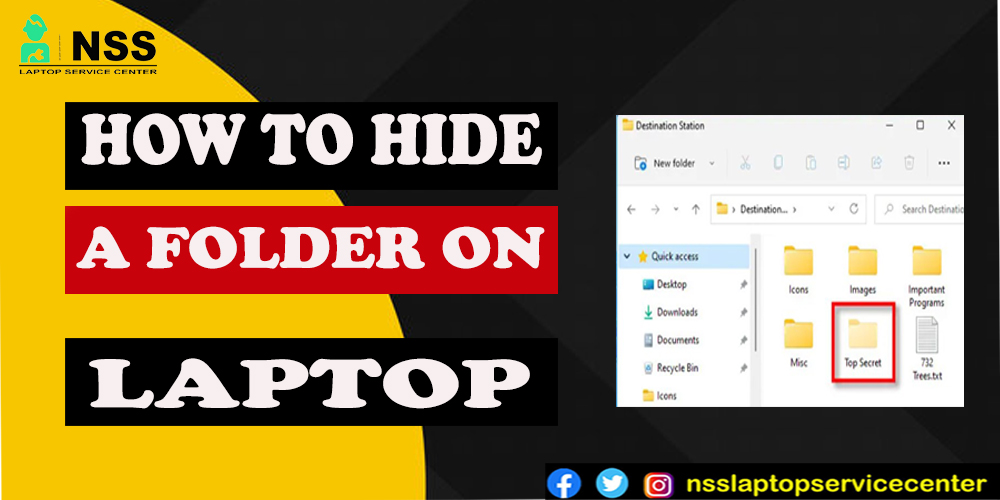
How to Hide Files in Windows 10 with File Explorer
As you might have guessed, the easiest way to hide a file or folder in Windows 10 is through File Explorer. Not very pretty, but who cares as long as the job gets done?
The most inherent way to hide a folder in Windows 10 is through File Explorer. An easily accessible trackbar makes it trivial for anyone to declutter their drives. Here's how you can access it:
-
Open the folder or file properties
Before you can hide folders or files, you need to right-click the item in question and select "Properties."
-
Select the file or folder hide box.
In the "General" tab of your file properties, look for the "Hidden" checkbox and select it. If you hide a file, that's all you need to do. However, you must follow the additional steps before when you hide folders.
Meanwhile, if you're wondering how to unhide folders in Windows 10, that's simple – untick the Hidden box.
Press "OK" when you're done.
-
Apply the folder hide to subfolders and files.
A hidden folder in Windows 10 has two options: you can hide just the root directory or both its subfolders and files.
You may be wondering what the point of this is if the base folder will be gone from File Explorer anyway. The answer is that if you don't hide subfolders and files, they may still show in search results even if they're not easily accessible through File Explorer.
You'll likely want to click "Apply changes to this folder, subfolders, and files" and press "OK."
-
How to show hidden files on Windows 10
If you accidentally hide the wrong folder or need to reaccess one, you can see hidden files in Windows Explorer with this easy push button:
Click the "View" tab, thin your File Explorer ribbon, and look for the "Show/hide" section. Untick the option that reads "Hidden items." Your hidden folders and files will then display with a slightly grayed-out icon.
How to Hide a Folder in Windows 10 with Command Prompt
Ready? First, you must determine what files and folders you want to hide. I created a second folder in M for this blog, Documents, which I named "Gib shares." Inside, I've dumped a .jpeg file called Crazy Russian. So, now, I will try to hide crazyrussian.jpeg using the command prompt. So, for example:
Step 1. Ensure that all the files are where they're supposed to be.
Step 2. Click on Start and type in "command line."
Step 3. Click on the Command Line icon or hit Enter to continue.
Step 4. In CMD, type in or paste the following line:
attrib C:\Users\V\Documents\Gib shares\crazyrussian.jpg +s +h
Step 5. Hit Enter to continue.
Note: while performing this operation, you should swap the path mentioned above with the location of your folder. If you're too lazy to type in the whole course of the folder, you can always use File Explorer.
Open the folder using Explorer, select the path, and copy it. Go back to the command prompt and paste the line. Now, you only need to add the File you wish to hide and the +s and +h attributes.
By the way, +s stands for System file, which means that the operating system will use it, while +h, which stands for hidden, instructs the OS that the File attributed this way will not show up in the GUI nor be indexed by Windows' search engine.
That's about it: how to hide files on Windows 10. Of course, being the precise kind, I've searched for even more ways to hide stuff. Enjoy!
If you're on a GUI-less install or need to automate the process, you can also hide folders and files in Windows 10 with a command. We'll show you how below. The controls work both on the Command Prompt and in PowerShell:
-
Open Command Prompt
-
Start and type "CMD," then press the top result, "Command Prompt."
-
Select the folder you want to hide and run the 'attrib +h' command
-
Before performing our folder or File hide, we must navigate to its parent folder.
For example, we want to hide the "Personal Files" folder. This is in our OneDrive documents folder, so we'll navigate to Documents in CMD with the cd command:
cd C:\Users\yourusername\OneDrive\Documents
-
Now that we're here, we can hide a directory or File by adding the +h attribute to it:
Attrib +h "Personal Files"
-
Switch Personal Files out for the name of your folder or File.
-
Hide files and subfolders.
-
If that's what you need to do. If you're hiding a file, you must run one more command. If you want to hide a folder, though we've hidden the root folder, we still need to hide all the files and folders inside. To do that, you can navigate inside the folder with cd "Your Folder" and run the following command:
Attrib +h /s /d
-
All of the items with the hidden attribute will now be invisible.
How to Unhide Folders and Files with Command Prompt
Now, if you want to undo the changes (unhide a remote file), you only need to change the operators in front of the "s" and "h" attributes. So, instead of a "+", you should "-". Let me give you a quick example:
Attrib C:\Users\V\Documents\Gib shares\crazyrussian.jpg -s -h
You can unhide folders or files with Command Prompt with a very similar command to hiding them. This time, however, we have to remove the hidden attribute rather than add it. Here's how:
-
Open Command Prompt
-
Press Start and type "CMD," then click the top result, "Command Prompt."
-
Unhide a folder of Files with the 'attrib' command.
-
In your Command Prompt Window, navigate to the parent directory of the File or folder you'd like to unhide. In our case, we want to unhide a folder called "Personal Files," which is in our OneDrive Documents folder:
cd C:\Users\username\OneDrive\Documents
-
Switch the above command with the path to your parent folder and press Enter. Then run the attrib -h command to unhide the File or folder of your choice:
Attrib -h "Folder or File name"
-
Unhide subfolders and files in window 10
-
If you unhide a folder with the above method, you'll notice that its sub-folders and files will still be hidden. You can remedy this by navigating to the folder with cd "Folder Name" and running:
Attrib -h /s /d
-
There you have it. You now know how to hide or unhide folders and files in Windows 10.
Checking if a file\folder is hidden
Step 1. Go through File Explorer. Double-click your desktop's File Explorer icon or press the Windows + E key buttons.
Step 2. Select View.
Step 3. Select Options (in the far-right corner, next to the show\hide section).
Step 4. From Options, select the Change folder and search options.
Step 5. Click on the View tab.
Step 6. Scroll until you see the Hidden fileFiles foldFolderp-down menu.
Step 7. Check the box next to the "don't show hidden files, folders, or drives" option.
Step 8. Click Apply to commit changes.
Step 9. Press the OK button to close the window.
How to password-protect a folder in Windows 10
Because you were patient enough to read the blog to the end (I hope I didn't bore you to death), I will show you how to password-protect a folder in Windows 10.
Step 1. Gather whatever you want to lock in your password-protected folder (documents, videos, audio clips). I recommend creating a new folder and putting everything in there for easy access.
Step 2. When ready, right-click anywhere on the screen (ensure the folder's open), select new, and highlight Text document.
Step 3. Double-click on the newly created text document.
Step 4. Paste the following text into the text document:
close
@ECHO OFF
title Folder Locker
if EXIST "Control Panel. {21EC2020-3AEA-1069-A2DD-08002B30309D}" goto UNLOCK
if it does NOT EXIST, go to MDLOCKER
: CONFIRM
echo Are you sure you want to lock the folder(Y/N)
set/p "cho=>"
if %cho%==Y goto LOCK
if %cho%==y goto LOCK
if %cho%==n goto END
if %cho%==N goto END
echo Invalid choice.
goto CONFIRM
: LOCK
ren Locker "Control Panel. {21EC2020-3AEA-1069-A2DD-08002B30309D}."
attrib +h +s "Control Panel.{21EC2020-3AEA-1069-A2DD-08002B30309D}"
echo Folder locked
goto End
: UNLOCK
echo Enter the password to Unlock the folder
set/p "pass=>"
if NOT %pass%==Your-Password-Here goto FAIL
attrib -h -s "Control Panel. {21EC2020-3AEA-1069-A2DD-08002B30309D}"
ren "Control Panel. {21EC2020-3AEA-1069-A2DD-08002B30309D}" Locker
echo Folder Unlocked successfully
goto End
: FAIL
echo Invalid password
goto end
: MDLOCKER
MD Locker
echo Locker created successfully
goto End
: End
Step 5. To set your password, delete the line Password Here" and replace it with anything. Here's how it should look:
If NOT %pass%==Youshallnotpass goto FAIL
Step 6. Click on File and select the Save As option.
Step 7. Under Save as Type, select All Files.
Step 8. Under the file name, delete everything and replace it with FolderLocker.bat
Step 9. Click Save and exit the document. If you receive a prompt regarding the extension change, click Yes to confirm.
Step 10. In the Explorer Window, double-click on the Folder Locker .bat executable. You will see that the Locker folder will appear in the exact location of the hide-to-be files.
Step 11. Place the files you want to password-protect in the Locker folder.
Step 12. Double-click again on the FolderLocker .bat executable.
Step 13. A command prompt window will appear with the following message: "Are you sure you want to lock the folder (Y/N)."
Step 14. Type in "Y" and press Enter. The command prompt window will now be closed.
Step 15. To unlock the contents of the Locker folder, double-click on the FolderLocker .bat executable. A new command prompt window asks you to type in the password. Enter the password, hit Enter, and voila! You now have access to your footlocker.
Conclusion:
Well, that's all I could round up on hiding folders on Windows 10. Of course, there are always more ways to do that, but it involves messing with third-party tools, which I found rather tricky.
This is particularly true of the documents folder, which will accumulate configuration files, game saves, and other clutter that can make it challenging to remain productive over time. I hope you understand all the accessible methods mentioned above about hiding files in Windows 10 and unhiding folders in Windows 10. For more private assurance, I also said how to password-protect a folder in Windows 10. If you like this blog, just let us know about your experience reading it or if this is helpful to you.


Popular Post
- Refurbished Laptops In Mumbai Hp Dell Lenovo Acer Asus Macbook
- Fixing An Apple Macbook Plugged In Not Charging Issue
- How To Boot Hp Laptop Access Boot Menu
- How Can I Connect The Laptop To Tv
- Best Gaming Laptops Under 2 Lakh
- How To Clean MacBook At Home
- Whats The Repair Cost Of Macbook Water Damage
- Microsoft Surface Laptop SE LCD Screen Replacement & Repair
- Why My Laptop Battery Not Charging
- How To Remove Autofill On Chrome
Categories
NSS Laptop Service by Location
Popular Services
- MacBook Battery Replacement Cost
- HP Printer Repair in Delhi NCR
- Dell Laptop Repair
- HP Laptop Repair
- Samsung Laptop Repair
- Lenovo Laptop Repair
- MacBook Repair
- Acer Laptop Repair
- Sony Vaio Laptop Repair
- Microsoft Surface Repair
- Asus Laptop Repair
- MSI Laptop Repair
- Fujitsu Laptop Repair
- Toshiba Laptop Repair
- HP Printer Repair Pune
- Microsoft Surface Battery Replacement
- Microsoft Surface Screen Replacement


